|
The catalog layout page allows you to post your products in a way that integrates automatically with our shopping cart. In this article, you'll learn the following:
Adding a Catalog Page
- Click 'Edit Site' and then 'Add Page.'

- Select 'Catalog' and then click 'Select Page Type.'
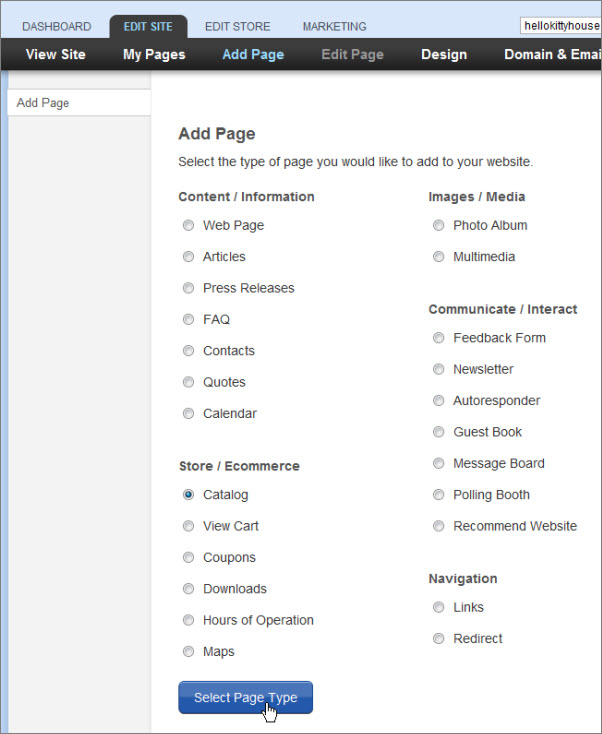
- Enter a 'Menu Name.' (text that shows in your navigation menu for your page), choose whether the page will show in your navigation menu, enter the web address ending you would like, select a layout (you can switch this later if you like) and click 'Add Page.'

How Products Are Displayed
There are 3 ways to display your products on your Catalog Main page:
Product List:

Product Thumbnails:

 NOTE:..Product thumbnails when using the Product Thumbnails layout, will now be displayed at sizes up to a maximum of 640x640 pixels. Existing images will be scaled up to the largest size possible. The exact size of your thumbnails will depend on the dimensions and aspect ratio of your product images, as well the catalog's Columns setting. To adjust the size of your product thumbnails, you can upload new images via the Edit Product page, or adjust the number of columns via the Catalog Settings page. Catalog pages with fewer columns will display larger images. NOTE:..Product thumbnails when using the Product Thumbnails layout, will now be displayed at sizes up to a maximum of 640x640 pixels. Existing images will be scaled up to the largest size possible. The exact size of your thumbnails will depend on the dimensions and aspect ratio of your product images, as well the catalog's Columns setting. To adjust the size of your product thumbnails, you can upload new images via the Edit Product page, or adjust the number of columns via the Catalog Settings page. Catalog pages with fewer columns will display larger images.
Product Previews:

When you click on a product, your products shows like this:

NOTE:. You can change the way the 'Add to Cart' button looks.
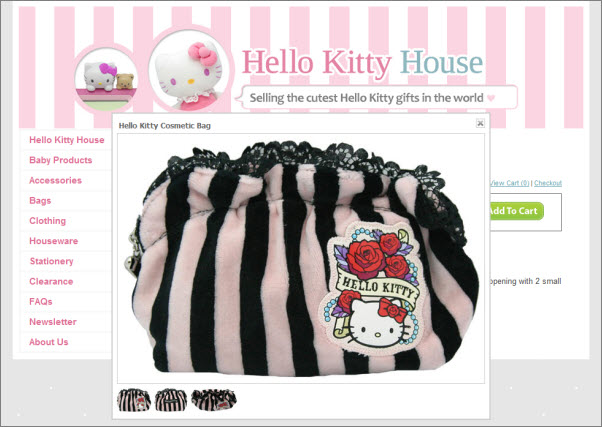
When you click on the link to see larger images of the product, it displays like this:
Changing Your Product Display
- On your catalog page, click 'Edit Page.'

- Click 'Catalog Settings.'

- Click on the layout you would like. Below that, you can optionally have your product prices hidden from view (they show only after you put an item in your shopping cart). This feature is designed for those companies in the trades that require a customer to show an intention to buy before a price shows.

Adding a Product
- On your catalog page, click 'Edit Page.'
=
- Click 'Add Product.'

- Fill in the empty text boxes as described below. A * denotes an optional field.
Product Code*: Enter a code for identifying your product.
Name of Product: Displays on both the catalog main and product pages.
Original Price: This is the standard price for the product and is listed in black on both the catalog main page and product page. If you enter a 'Sale Price', this price will show as crossed out with the sale price listed below.
Sale Price*: This is a discounted price that is displayed in red below your standard product price.
Page URL: This gives you the option to customize the web address for this product. For example, if the web address of your catalog page is http://www.hellokittyhouse.com/hello_kitty_bags.html and you enter "hello_kitty_cosmetic_bag" in the box, the web address of your product page will be http://www.hellokittyhouse.com/hello_kitty_bags/hello_kitty_cosmetic_bag.html.
Price Visibility: This allows you to choose whether the product price shows or not. You can also edit this option for all products in a catalog in the 'Catalog Settings' tab. Note that the price will show when the product is added to your shopping cart. This was designed specifically for the trades where prices may not show until a customer has shown an intention to buy.
By default, all prices will show or hide based on what you chose for your catalog.

This is how your Sale Price appears to your customers:

Full Description*: Enter a description, dimensionts and any other information you think is important. This information will be listed on the individual product pages and will not be seen on the catalog main page.

This is how it looks to customers:

Summary*: This description shows on the catalog main page if you're using the Product Previews layout.

This is how it looks to your customers:

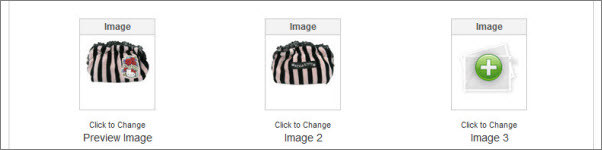
Product Images*: Post up to 3 product images using the Click to Change boxes. The 'Preview Image,' the left-most image box, will be displayed as a thumbnail image on both the Product Preview and Product Thumbnails layouts. All 3 images are shown on the product page.
If you want to show more than 3 images, you can do so by entering them within the 'Full Description' text box.
After your customer clicks on the link to view larger size images, a window like the one below pops up and your customer can click on the thumbnails to see the images larger:
Upload Downloadable Products*: If you are selling a file like an ebook, you can click the button to add it here. More info on selling files can be found here.

Shipping*: Enter your shipping information if you plan to use our shipping calculator which is integrated with UPS, USPS and FedEx. You can optionally set up custom shipping. None of the information in this area will show to the customer.
Product Variants*: Checkmark this box if you would like to offer options that may or may not have different prices (e.g. Small size shirt - $10, Large size shirt - $12). Below, a new editing area will appear. Enter your 'Variant Title' and click the "Add Variant" button to add your options. After you've entered at least 1 variant, you can click the 'Copy' link to copy the information for one variant to a new variant. See Price Differences for Sizing, Style, Color, etc. for detailed instructions.
Inventory Management*: Use this area to keep track of your inventory and to automatically post notices when a product has run out.
If 'Product Variants' is enabled along with this option, for each variant, you can input your amount in stock. More details on inventory management can be found here.
Check to make this item invisible*: You can choose to hide items from visitors without having to remove them from your catalog by checking off this box . Note that a person can still access the product by going directly to the web address. A good idea is to also checkmark 'Check to make this product unavailable' just in case.
Check to make this product unavailable*: This will make the product still show on your site, but the customer will not be able to add the item to their cart.
Purchase Comments*: Fill this out if you would like to collect additional information from the customer.
Additional Product Options*: You can offer up to three additional options for each product by completing the Additional Product Options Lists below. Each list lets the purchaser select one option like Color from a list of options like Red, Blue, or White. You can make these mandatory selections which require someone to physically select an option from the drop down or not mandatory and as such will default to the first option listed in the list.
Send Email*: This allows you to have an email automatically sent to a customer after they complete a purchase. This is only applicable if you have set up an Authorize.net merchant account.
If a customer has purchased more than one item that has a 'Send Email' message attached, all of these messages will be listed and sent in the same email.
 If you're selling a product that needs to be shipped, do NOT use the downloadable product portion of the product information page to provide a downloadable item like a PDF instruction manual. Doing so will eliminate the shipping costs associated with the item needing to be shipped, as the system will think that the product is downloadable and will not require shipping. If you're selling a product that needs to be shipped, do NOT use the downloadable product portion of the product information page to provide a downloadable item like a PDF instruction manual. Doing so will eliminate the shipping costs associated with the item needing to be shipped, as the system will think that the product is downloadable and will not require shipping.
If you want to provide a PDF manual, do so on another page using the Multimedia page type.
Title Tags and Meta Tags
Title tags and meta tags can be applied to your catalog page (the page where your products are listed) and each individual product page. These are often used as the text that appears on search engine listings and may help improve your ranking for keywords. Here's more information on each one:
Title Tag: The text you enter for your title tag appears in 2 places:
- on your browser tab as the title of the page

- typically, as the link text for your search engine listing for your page
Try to keep your title tag text short and make sure it contains your most important keyword phrase.
Meta Description: The meta description is usually one sentence and describes your page. It is typically used as the description text on your search engine listing for your page (under your title tag link). You can insert keywords here, but make sure that you don't overdo it as it can become too long to read.
Meta Keywords: This should be a list of keyword phrases that describe your page. Just separate each phrase with a comma.
Here's how to add or edit them on your site:
- Go to any of your catalog pages and then click 'Edit Page' -> 'Properties.'
- A window pops up. In the field beside 'Edit,' it defaults to your catalog page. But, you can also click on the down arrow to show a drop down menu listing all your product pagess in alphabetical order for that catalog page. Click on the one you would like to edit.

- Enter in your text for HTML Title Tag, Meta Keywords and Meta Description. Then, save the page.

- Here's how the example above would typically look like on a search engine listing:

|


