|
To upload your own images, you need to open the image library. Do so by either:
- Clicking on a 'Click to Change' box

- Or, within the Easy Editor toolbar, clicking the 'Image' button.

Then, click 'Select Image' in the pop up window.
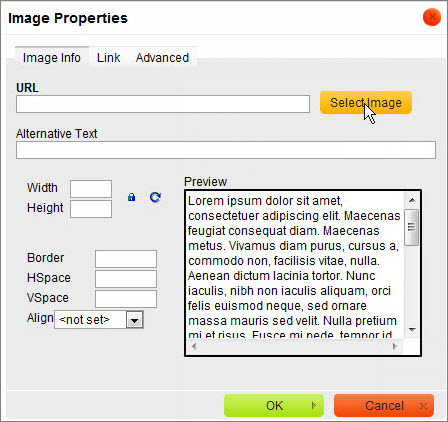
The 'Image Library' window will open. Next, follow the instructions below for either the New Image Uploader or the Old Image Uploader.
 IMPORTANT: Flash player 10 or higher is required for the new image uploader to work. To upgrade your Flash player please go to http://get.adobe.com/flashplayer/. The old image uploader will still be available for browsers that don't have Flash player 10 or higher. IMPORTANT: Flash player 10 or higher is required for the new image uploader to work. To upgrade your Flash player please go to http://get.adobe.com/flashplayer/. The old image uploader will still be available for browsers that don't have Flash player 10 or higher.
A. New Image Uploader
- Click the 'Browse...' button.

- Locate your image file on your computer.
NOTE: You may upload 10 images at one time. To select more than one image from a folder on your computer:
- SHIFT + Left Mouse Click to select 10 images that are next to each other and then click Open.
- CTRL + Left Mouse Click (Command + Mouse Click for a MAC) to select 10 images that are not next to each other and then click Open
 NOTE: For any images larger than 640 x 640 pixels the image uplaoder will automatically resize the image. NOTE: For any images larger than 640 x 640 pixels the image uplaoder will automatically resize the image.
If the image name has non alphanumeric characters the image uploader will rename the image to omit these characters.
- Beside 'Add to folder,' use the drop down menu to select which folder you wish to upload the images to or create a new folder. Images will go into the Main Folder by default otherwise. Click the 'Add Image(s)' button.
- To post one of your uploaded images, click on it in your Image Library. It will display in either the 'Click to Change' box you used to open the image library or the location of your cursor when you clicked the 'Image' button within the Easy Editor.
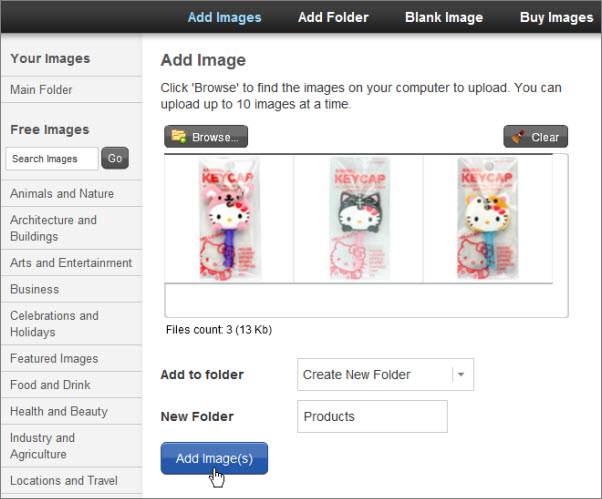
B. Old Image Uploader
- Click 'Add Images' at the top of the window.
- Click 'Browse...' to locate your image file on your computer.
- Click 'add another' to add another image browse field. Note that you can upload up to 10 images at one time.
- If you have created other folders in the image library, select a folder. Otherwise, it will default to your Main Folder.
- Click 'Add'.
 NOTE: For any images larger than 640 x 640 pixels the image uploader will automatically resize the image. NOTE: For any images larger than 640 x 640 pixels the image uploader will automatically resize the image.
If the image name has non-alphanumeric characters the image uploader will rename the image to omit these characters.
To use one of your uploaded images, click on it in your Image Library. It will display in either the 'Click to Change' box you used to open the image library or the location of your cursor when you use the 'Image' tool within the Easy Editor.
|

