|
Setup Instructions for PayPal Advanced
To sign up for a new business account, click here.
To upgrade your personal PayPal account to a business account, click here.
To become a member of PayPal Advanced, you must apply. Click here to apply to be a member of PayPal Advanced.
Once you have signed up for PayPal Advanced and been approved, you need to set up Payment Processing on your website by following these steps:
- Go to 'Edit Store' -> 'Payment Processing'.
- If this is your first time setting up payment processing options, select U.S. Dollar from the currency dropdown list. If your currency is already set to something other than U.S. Dollar, please contact support to request a change to USD.
- Select 'PayPal Advanced'.
- Enter your PayPal account email address.
- Click on the 'Save' button.

Once you have completed these steps, you need to set up your API Credentials on PayPal to link your PayPal Advanced account to your website. To do this, follow these steps:
- Log into your PayPal.com account.
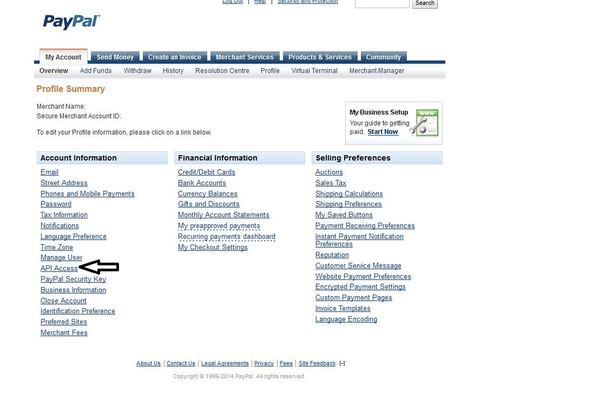
- Under the 'My Account' tab, click on 'Profile'.

- Under the 'Account Information' heading, click on the 'API Access' link.
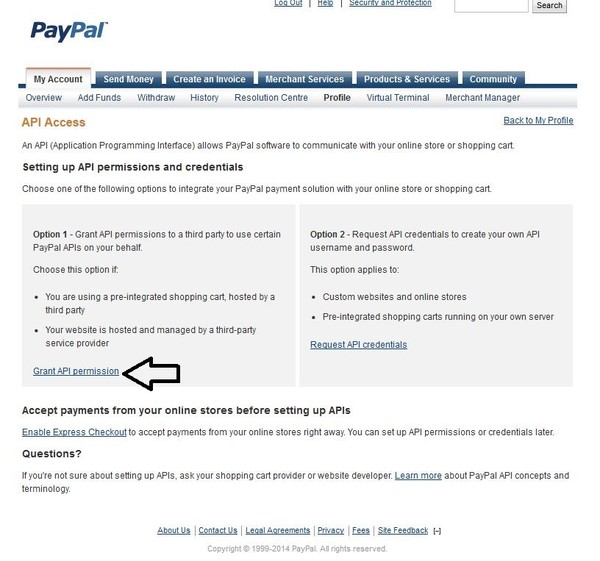
- On the 'API Access' page, under Option 1 ('Grant API permissions to a third party to use certain PayPal APIs on your behalf'), click on 'Grant API permission'.
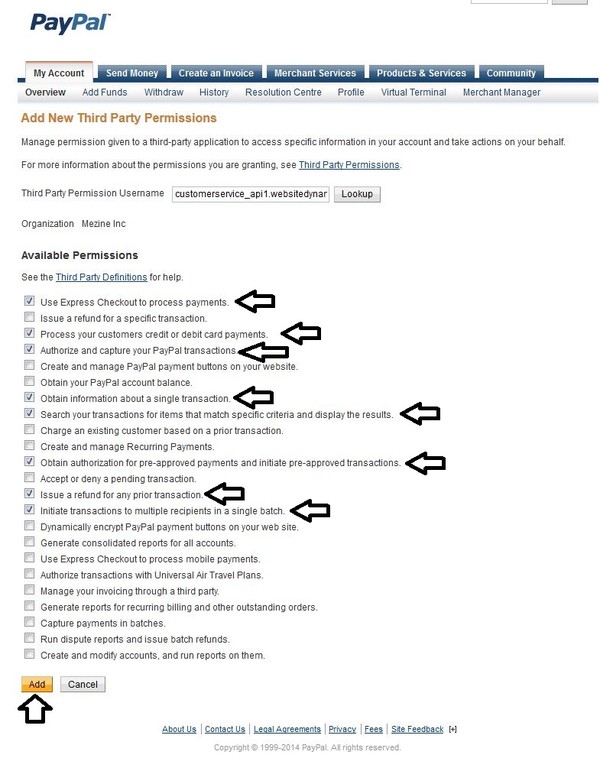
- Enter Third Party Permission Username customerservice_api1.websitedynamics.com and press 'Lookup'.

- It will then ask you to select the available permissions for the API. Check off the following permissions and click 'Add':
- Use Express Checkout to process payments
- Process your customers' credit or debit card payments
- Authorize and capture your PayPal transactions
- Obtain information about a single transaction
- Search your transactions for items that match specific criteria and display the results
- Obtain authorization for pre-approved payments and initiate pre-approved transactions
- Issue a refund for any prior transaction
- Initiate transactions to multiple recipients in a single batch
- A confirmation screen will appear with a successfully added API Username message.

|

